HOW TO PAINT CORRECT A VEHICLE?
Share
Paint correction is the process of removing imperfections from a vehicle’s paint, such as swirl marks, scratches, oxidation, and other surface defects, to restore a glossy, smooth finish. It’s typically done using a machine polisher with varying levels of abrasives to refine the paint’s surface.
Here's a step-by-step guide on how to perform paint correction on a vehicle:
Materials You'll Need:
- Polisher: Dual-action (DA) or rotary polisher (DA is safer for beginners)
- Polishing pads: Typically foam pads (cutting, polishing, and finishing pads)
- Polishing compounds/polishes: Different levels of abrasiveness (cutting, polishing, and finishing compounds)
- Microfiber towels: For cleaning and wiping off products
- Car wash soap: To clean the vehicle
- Clay bar: To remove contaminants
- Isopropyl alcohol (IPA) or panel wipe: To clean the surface before polishing
- Masking tape: To protect trim, rubber, and other areas from polish residue
1. Wash the Vehicle
- Thoroughly wash the car using a two-bucket method (one for soapy water and one for rinsing) to minimize scratching.
- Dry the vehicle with a microfiber towel to prevent water spots.
2. Clay Bar the Surface
- Use a clay bar to remove contaminants from the surface that regular washing doesn’t get. This step is important to ensure a smooth surface and to prevent scratching during the correction process.
- Spray clay lubricant onto a section of the car and gently glide the clay bar over the surface in a back-and-forth motion.
- Wipe off any residue with a microfiber towel.
3. Tape Off Sensitive Areas
- Use masking tape to cover plastic trim, rubber seals, and other areas you don’t want to polish.
- This will help avoid damaging sensitive areas with polish or the polisher.
4. Inspect the Paint
- Carefully inspect the vehicle’s paint under proper lighting. Use a swirl light or LED work light to highlight imperfections.
- Take note of areas with deep scratches, swirl marks, water spots, or oxidation. These will guide your approach to the type of polish and pad you'll need.
5. Choose the Correct Compound and Pad
- Cutting Compound: For deeper imperfections like scratches or oxidation.
- Polishing Compound: For lighter imperfections like swirl marks or minor defects.
- Finishing Compound: For refining the finish and achieving a gloss after the correction.
- Choose a cutting pad (typically more aggressive) for deep defects and a polishing pad (softer) for lighter defects. Use a finishing pad for the final polishing stage.
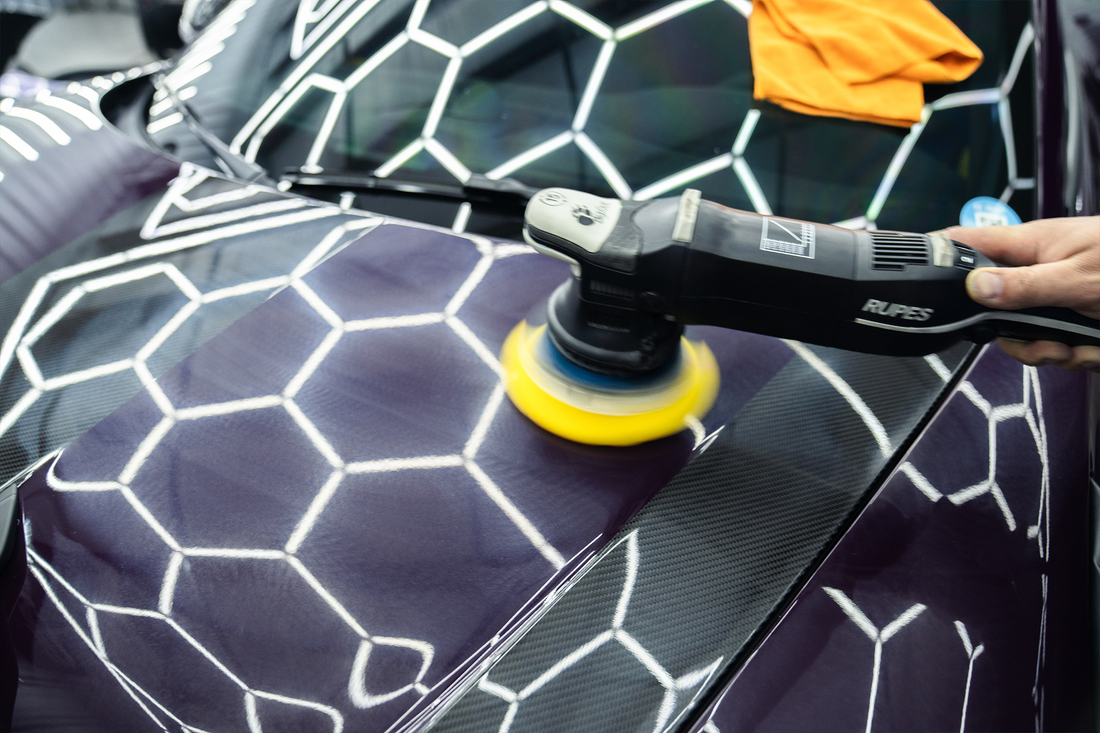
6. Start with the Correcting Stage
- Apply polish/compound to the pad: Apply a few dots of the cutting or polishing compound to the center of your pad.
- Apply the pad to the surface: Position the polisher on the paint, then turn it on at a low speed (3-4 on most machines). This will help avoid splattering.
- Work in small sections: Work on one section at a time, usually about 2x2 feet. Move the polisher in overlapping passes — horizontally, then vertically.
- Use the correct pressure: Press the polisher lightly, especially when you’re using a cutting pad. Let the pad do the work. If the pad is not spinning, you might need to increase speed or pressure.
7. Inspect Your Work
- After completing each section, wipe off the residue with a microfiber towel and inspect the paint.
- Check if the defects have been removed and if the finish is smooth. If some imperfections remain, repeat the process using either more aggressive polish or a different pad.
8. Refining and Polishing Stage
- After the cutting stage, switch to a polishing compound (if you used a cutting compound) and a polishing pad.
- Repeat the same procedure as before, but this time you’ll be refining the surface and removing any haze or micromarring left by the cutting compound.
- Once satisfied with the polished result, you can move to the final finishing compound if desired.
9. Final Polishing (Finishing)
- Use a finishing pad and a finishing polish to give the vehicle’s paint a final refined, glossy look. This will remove any micro-swirls or haze and provide a mirror-like finish.
10. Clean the Surface with IPA or Panel Wipe
- After the polishing process, clean the surface with isopropyl alcohol (IPA) (10-15% solution) or a panel wipe to remove any oils, residues, and polish marks.
- This step ensures you get a clear view of the actual finish and reveals the true depth of the paint.
11. Apply a Ceramic Coating
- After the paint correction is complete, you can apply a Ceramic Coating to protect the paint. This will enhance the shine and provide some protection against environmental contaminants.
- Apply it according to the manufacturer’s instructions and buff it off with a microfiber towel.
12. Final Inspection
- Inspect the entire vehicle once more under proper lighting. Check for any missed spots or imperfections and touch up those areas as needed.